This post will focus on the business of capturing, categorizing, and organizing your PDFs in a coherent library using Sente for Mac.
If you followed my last post, PDF Chaos? Digital Workflow Basics, I discussed the chaos that can ensue without establishing a coherent filing system for PDF documents–and illustrated it with a chaotic demo library. I then walked through some “do’s and dont’s” of filenaming, splitting, and OCRing PDFs in a library staging inbox. Here we will start to transform this disorganized library, and you will see how you can simplify and organize your PDF Chaos while also exploring how Sente can help you with the rest of your Academic Workflow.
So for the first post (of several) on Sente, I will focus chiefly on setting up libraries and introducing Sente’s key features. I assume you will have read my first post, Introducing Digital Workflows for Academic Research, and latest post where I give some basic principles for workflows with PDFs.
Subsequent posts will explore:
- Annotation and notetaking on PDFs, including tagging, and also annotating with your iPad on the go.
- Sente’s automated research and document collecting capabilities; smart collections; bibliographic formatting; and other selected advanced functions.
- How to make use of Sente Assistant and some amazing free Apple Scripts to integrate the power of OPML into your workflow so that you can move your Sente annotations into Devonthink Pro Office, Scrivener, and other software, for writing.
But, why Sente?
Some people will argue that it is not worth paying for Sente when there is other software like Mendeley, for example, which does similar things for free. This is a complex issue, which is not as simple as free or unfree–and similar can hide substantial difference. Since it cannot be discussed appropriately here, I will post a separate, companion piece on this issue, as it also offers the opportunity to discuss some key considerations about privacy and academic work, the pros and cons of paid versus unpaid software, and a more holistic view of the various trade-offs–including functionalities like social networking–that users should consider in selecting the core application component of their Digital Workflow among software like Sente, Papers, Mendeley, Zotero, and others.
For now, let’s just say it’s my opinion that Sente really shines over software like Zotero, for example, which does not offer an integrated cloud-based synchronization system for large PDF libraries and bibliographies along with a professional solution for serious annotation and idea collection during the review and thinking phase of your research. Again, with Devonthink, OPML scripts, and Sente Assistant, I’ll show you how you can use, search, tag, organize and analyze your collected quotes and comments from reading your PDFs, and even how to drop them into outlining software and use them as fungible material for your writing and production phase of work, but Sente itself is amazing as a one stop-shop tool. Sente’s versatility is what makes it so effective for maintaining control in the research process, leaving you ready to mold and create the research product you want, and is why I have chosen it as my staple workflow application.
In fact, according to President of Third Street Software, Inc. and Sente creator, Michael Cinkosky–with whom I’ve had the pleasure of discussing Sente and his long term goals for its development in some detail in preparing this and future posts–the name “Sente” derives from Japanese:
the name “Sente” is a Japanese term from the ancient game of Go. A player is said to have sente when they are controlling the direction of the game through the force of their moves. The other player is said to have gote (go-tay) because they have little choice but to respond passively to the player with sente. My goal with Sente was to help people feel more in control of their literature research and less like they were simply struggling to keep up.
As he elaborates, this vision of control drove the development of the software’s various features to where it is today:
My primary goal when I launched this company was to make it easier for people involved in research to acquire, organize and keep abreast of the literature most relevant to their research. I had already spent many years building software systems in support of scientific research (mostly biology) but I regularly heard complaints from users about how hard it was for them to stay current with the literature. All of the reference managers at the time were focused on formatting bibliographies, not on facilitating literature discovery and organization. I asked people what tools they were using to stay current with the literature, but they never had any. Programs like EndNote were (accurately, I think) seen as formatting tools, but not research tools.
So that is the main problem we have been focused on. For the first couple of years, we did not even do bibliography formatting, but people obviously want their reference manager to format bibliographies, so we eventually added this capability. But our primary focus was, and remains, on search, acquisition, organization, understanding, etc. Thus, we have devoted significant effort to features like: hierarchical tagging (what we call QuickTags); the ability to automatically capture quotations when highlighting text in a PDF; and transparent sync that lets you have your library up-to-date at all times, across all your Macs and iPads (and, soon, iPhones). We understand that people involved in academic research never really stop thinking about their research and they want to know they are not missing anything important in their field, and that once they find something, they don’t want to lose it. Our vision for Sente is that it be integral to the day-to-day activities of becoming, and remaining, an expert in each user’s chosen area of study.
I also asked Michael about how he sees Sente in relation to “free” tools like Mendeley, especially with regards to privacy and monetization, and he was kind enough to give me some details of his vision for the future of Sente. As I already said, I will discuss these issues in a later post.
Download Sente
Now, if you’re new to Sente, head on over to Third Street Software and download it, if not you might already know the basics covered here. The free license allows you a limited library, but the $59.99 academic license is completely worth it, giving you unlimited libraries and as much cloud synchronization space you need. If you’re not convinced, use the free version until you are.
Considerations before we begin
Sente is a powerful piece of software that includes many functions. The next few posts are merely designed to demonstrate what you can do with it in some elementary ways, but I insist that–as with anything else worthwhile–if you like what you see in trying it here, you will need to eventually spend some time reading the Sente manual, especially in regards to its more complex cite and scan features, the use and modification of citation styles, the integration of Sente with Microsoft Word, Scrivener, and Mellel, setting up autolinks etc. I realize that many people might balk at this initially because learning new software can often interfere with our work and involves an investment of precious time. But the truth is that Sente is such an amazing program because it combines several functions and processes that used to belong to multiple applications, streamlines them, and as such is worth spending some time (beyond reading these posts) to learn to use properly if you like what you see.
Capture and Organization
Sente’s first amazing feature is its easy interface for capturing PDFs and organizing them, which I focus on in this post, leaving aside its research collection functionalities for later.
Before we start bringing in our PDFs, let’s set it up. I argued previously that it is really important to have a consistent system of filing. David Allen reccomends an A-Z file, and I agree. Basically, I think every Sente library (which can be set up as a local or synced library) should be set-up with the Chicago Author-Date (or APA) system in mind–and I mean this conceptually: Sente will allow you to format your actual citations and bibliography in all of the standard styles, and thousands of others. All I mean is that we will set up the library so that when you add a PDF to Sente, it will be re-named, added to the library bundle, deleted in its previous location, and given a new name based on its Author-Date-Title.
Here is a demo library, DigitalWorkflows, I’ve made for this series.
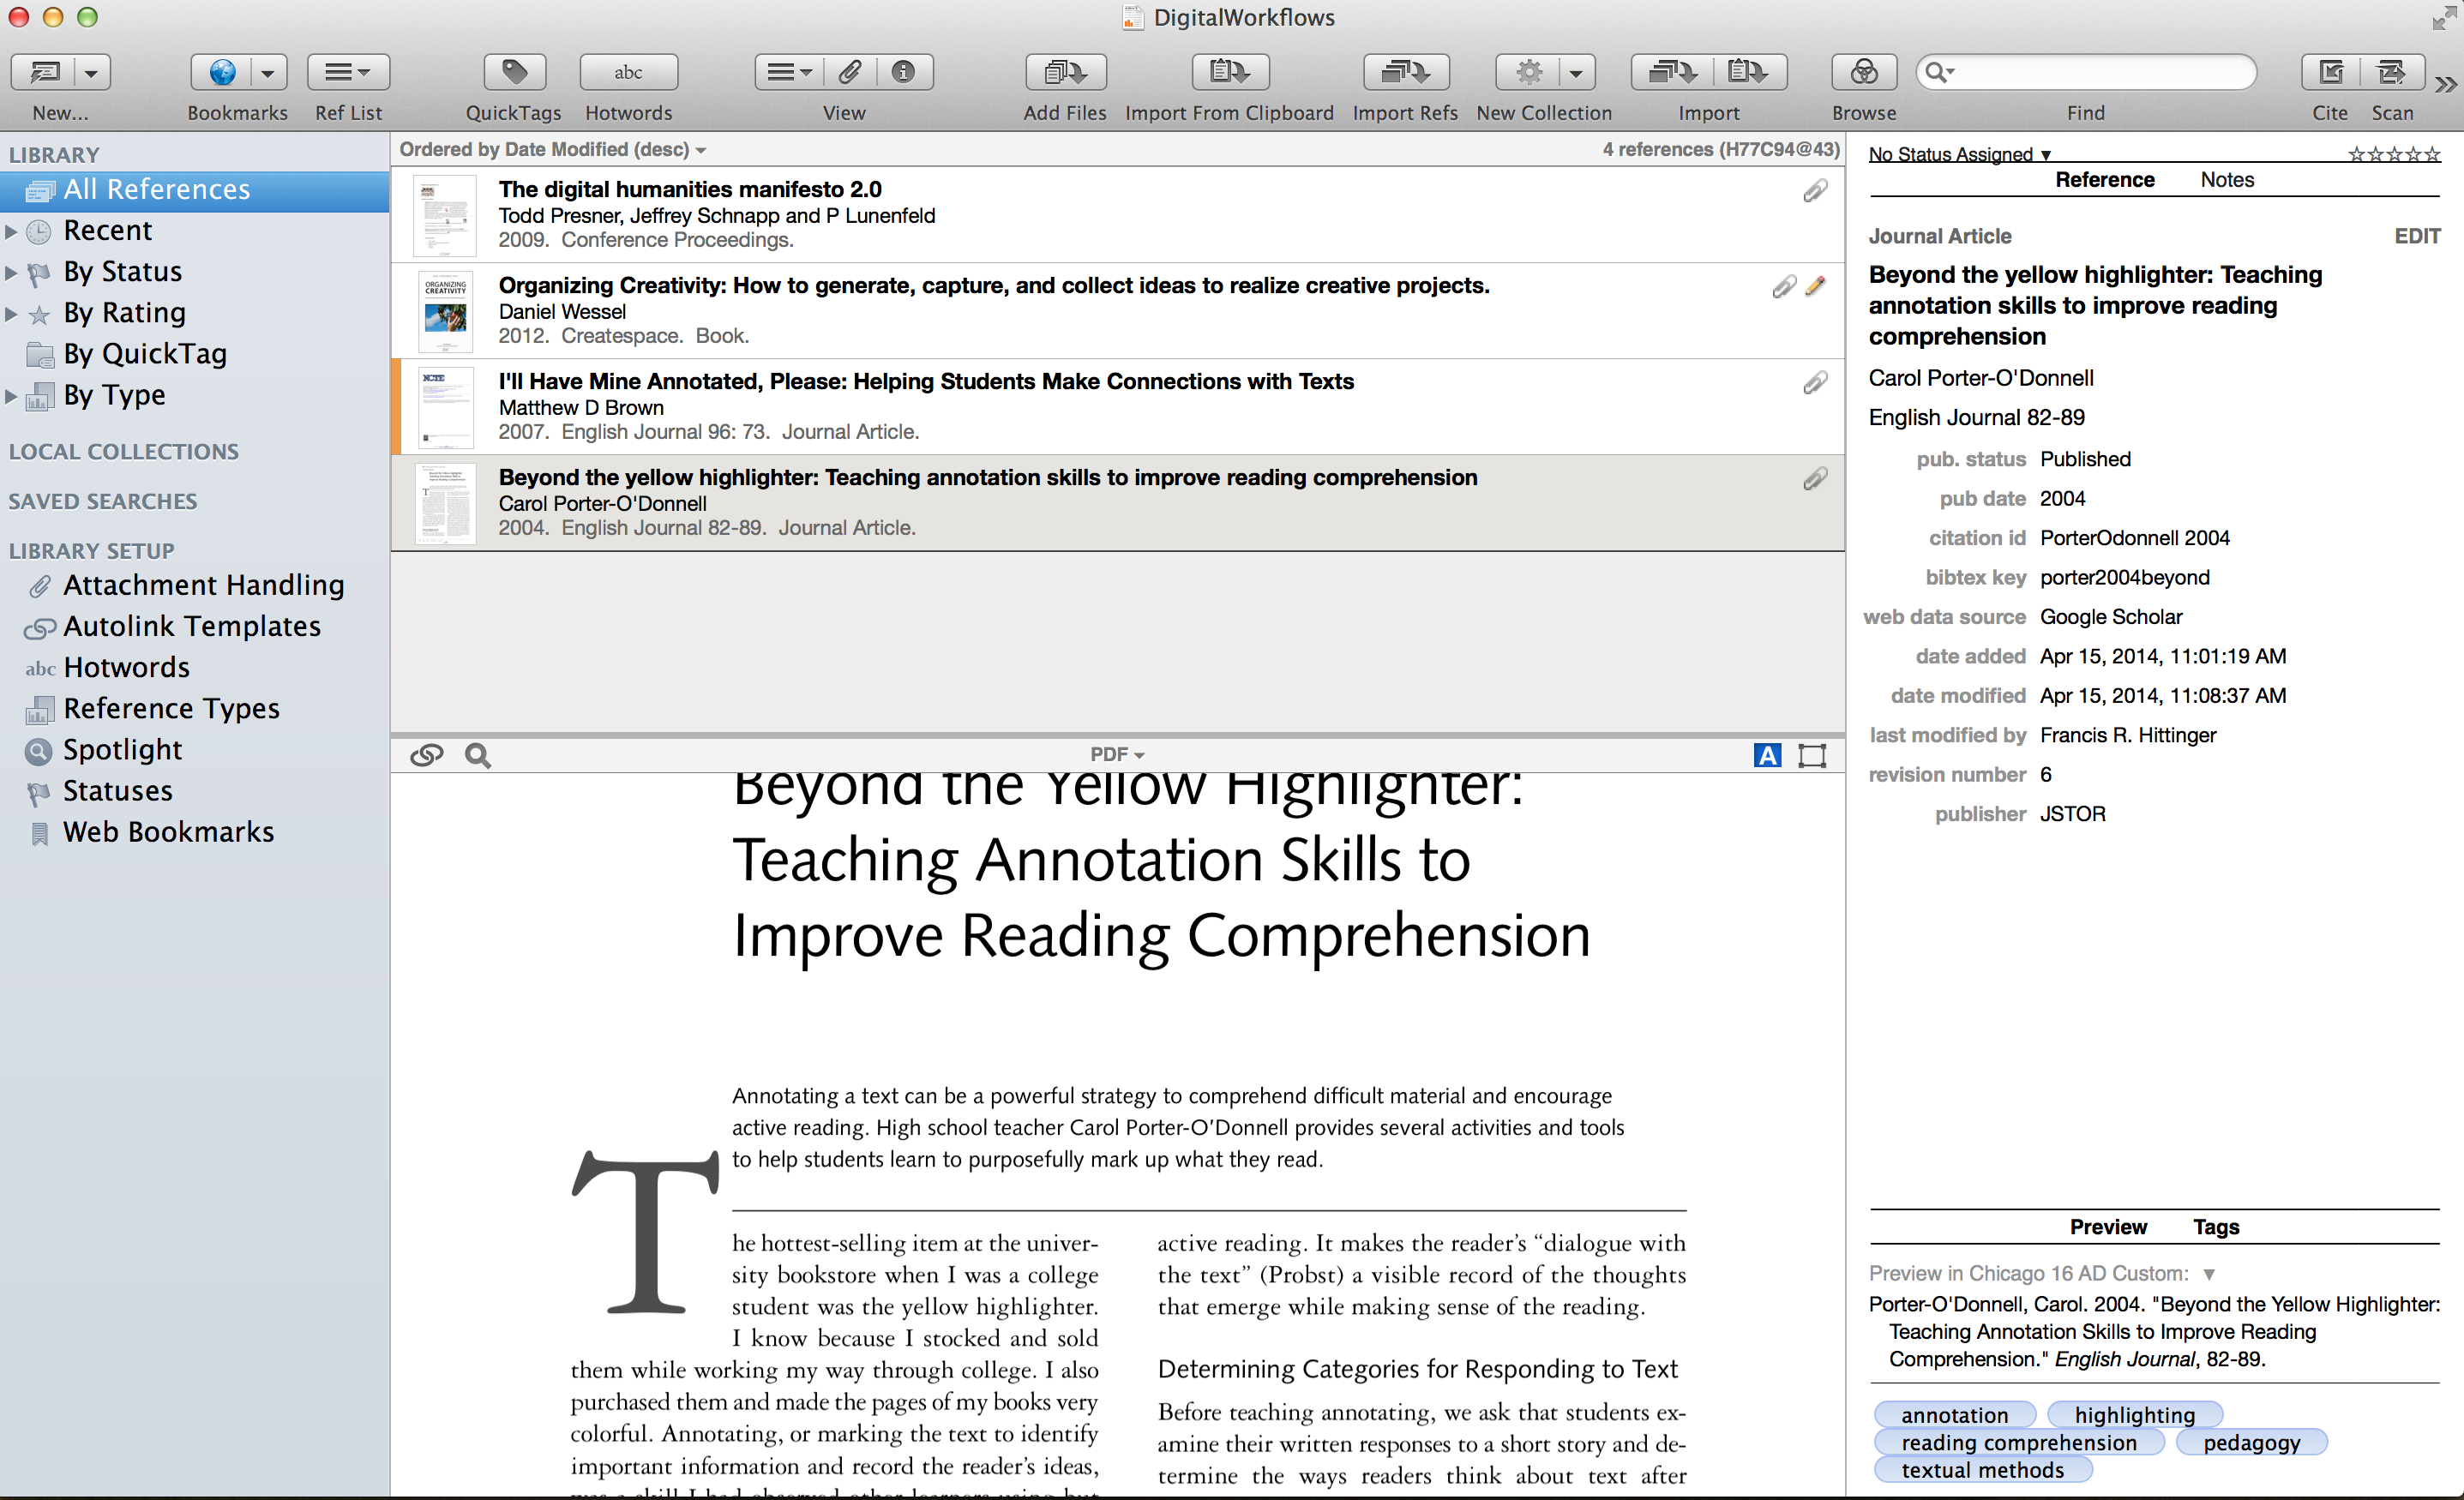
For now, I will let the user explore the greater interface. Let’s go immediately to “Library Setup,” and “Attachment Handling.”
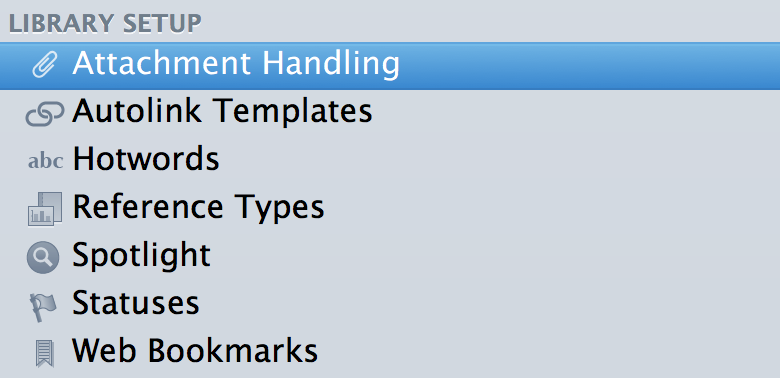
“Attachment Handling” is where you set up your library. “Attachment” handling because Sente is going to allow you to create a reference in your library and attach the document to that reference.
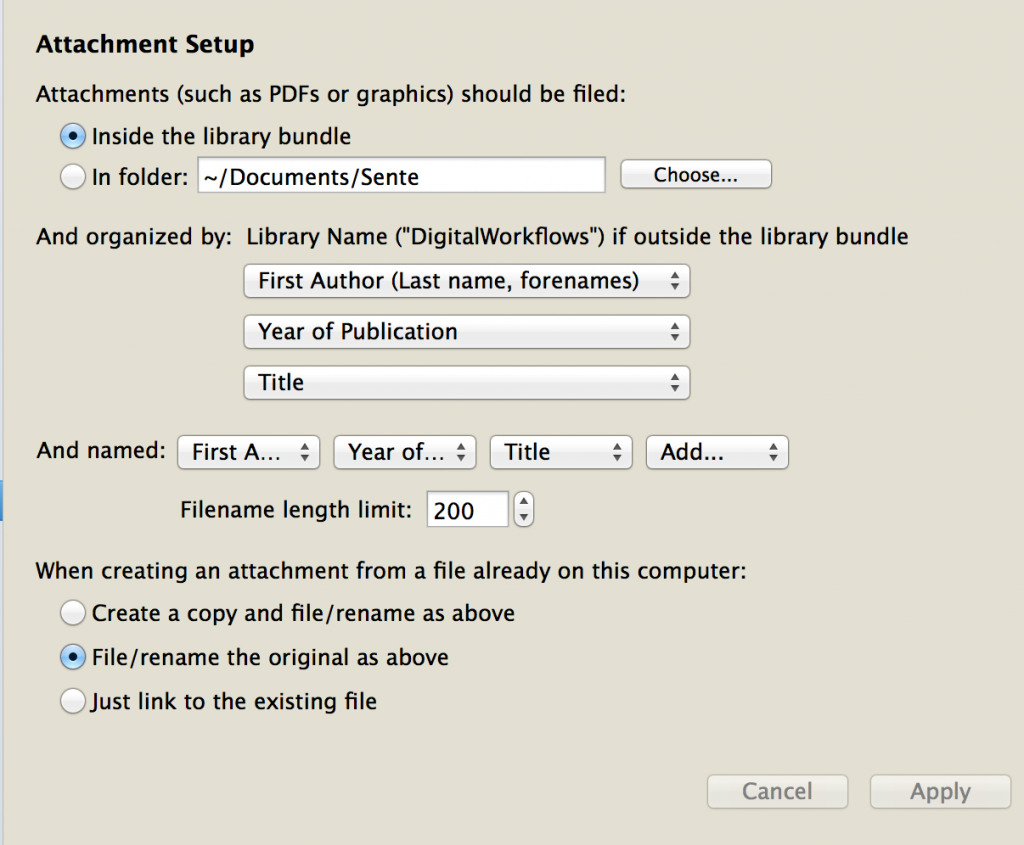
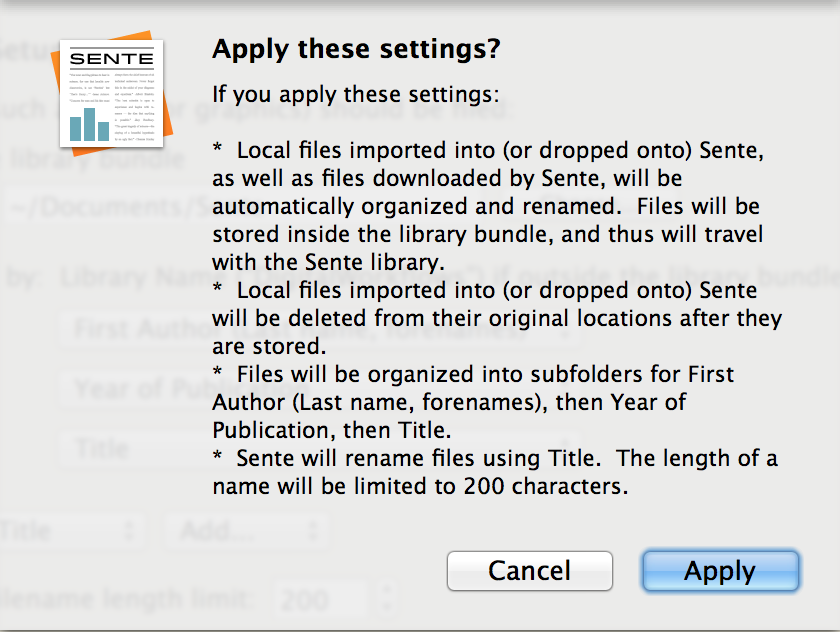
While there is a separate panel of Sente Preferences, the library settings are mainly here. I reccommend the following settings (as pictured above)–but the good thing is that no matter what you choose for your file names and filing system, even if you have a thousand items and attachments, Sente will automatically re-name and re-file everything for you to fit your needs and whim, even if you change your mind later.
As I indicated, I model mine on the Chicago Manual of Style Author-Date model, which is very similar to APA bibliographic model, and in any case, makes perfect rational sense: a folder for every Author (Last Name, fore name), a folder for the Year/Date of works, and a folder for individual Titles (which is a good policy, especially if an author has more than one book or article published in the same year).
With Sente, when the file gets added to a library with this setup, the PDF is automatically renamed too. When we press apply, as the Sente box here shows, the software will now set up this structure for your library, and henceforth automatically move the files to the bundle, rename them, and delete the old files. Again, I advise selecting “file/renaming” instead of making a copy, because it makes little sense to have multiple versions of PDF files loose on your system outside of the library–unless under special circumstances.
Go ahead, press apply. Once you hit apply, you will receive a notification explaining your choice:
Now, you may be wondering what “inside the library bundle” means. Where will Sente put my stuff? Sente stores files inside a closed library as a Sente library file, aka “bundle” (with a “.sente6lib” file extension), but don’t worry, that doesn’t mean you can’t access it. In fact, it just means that it keeps things filed for you automatically. The bundle is like a package containing all the references, attachments, and other information that comprises your entire library. Thus each library file is a bundle in this set up, and while you can set up libraries without bundles, this is not recommended, because it presents a hazard for breaking libraries and opens the door to losing data and inconsistencies. I make a master library for all my documents, and make new libraries including those and other files–or merely import Zotero or Endnote bibliographies as libraries–for different projects or with specific products in mind.
I want to show what things actually look like in your library bundle, so that you understand the rationality of the organizing principle Sente operates on, and so that you see concretely what the above pictured configuration looks like under the hood.
Library Bundle
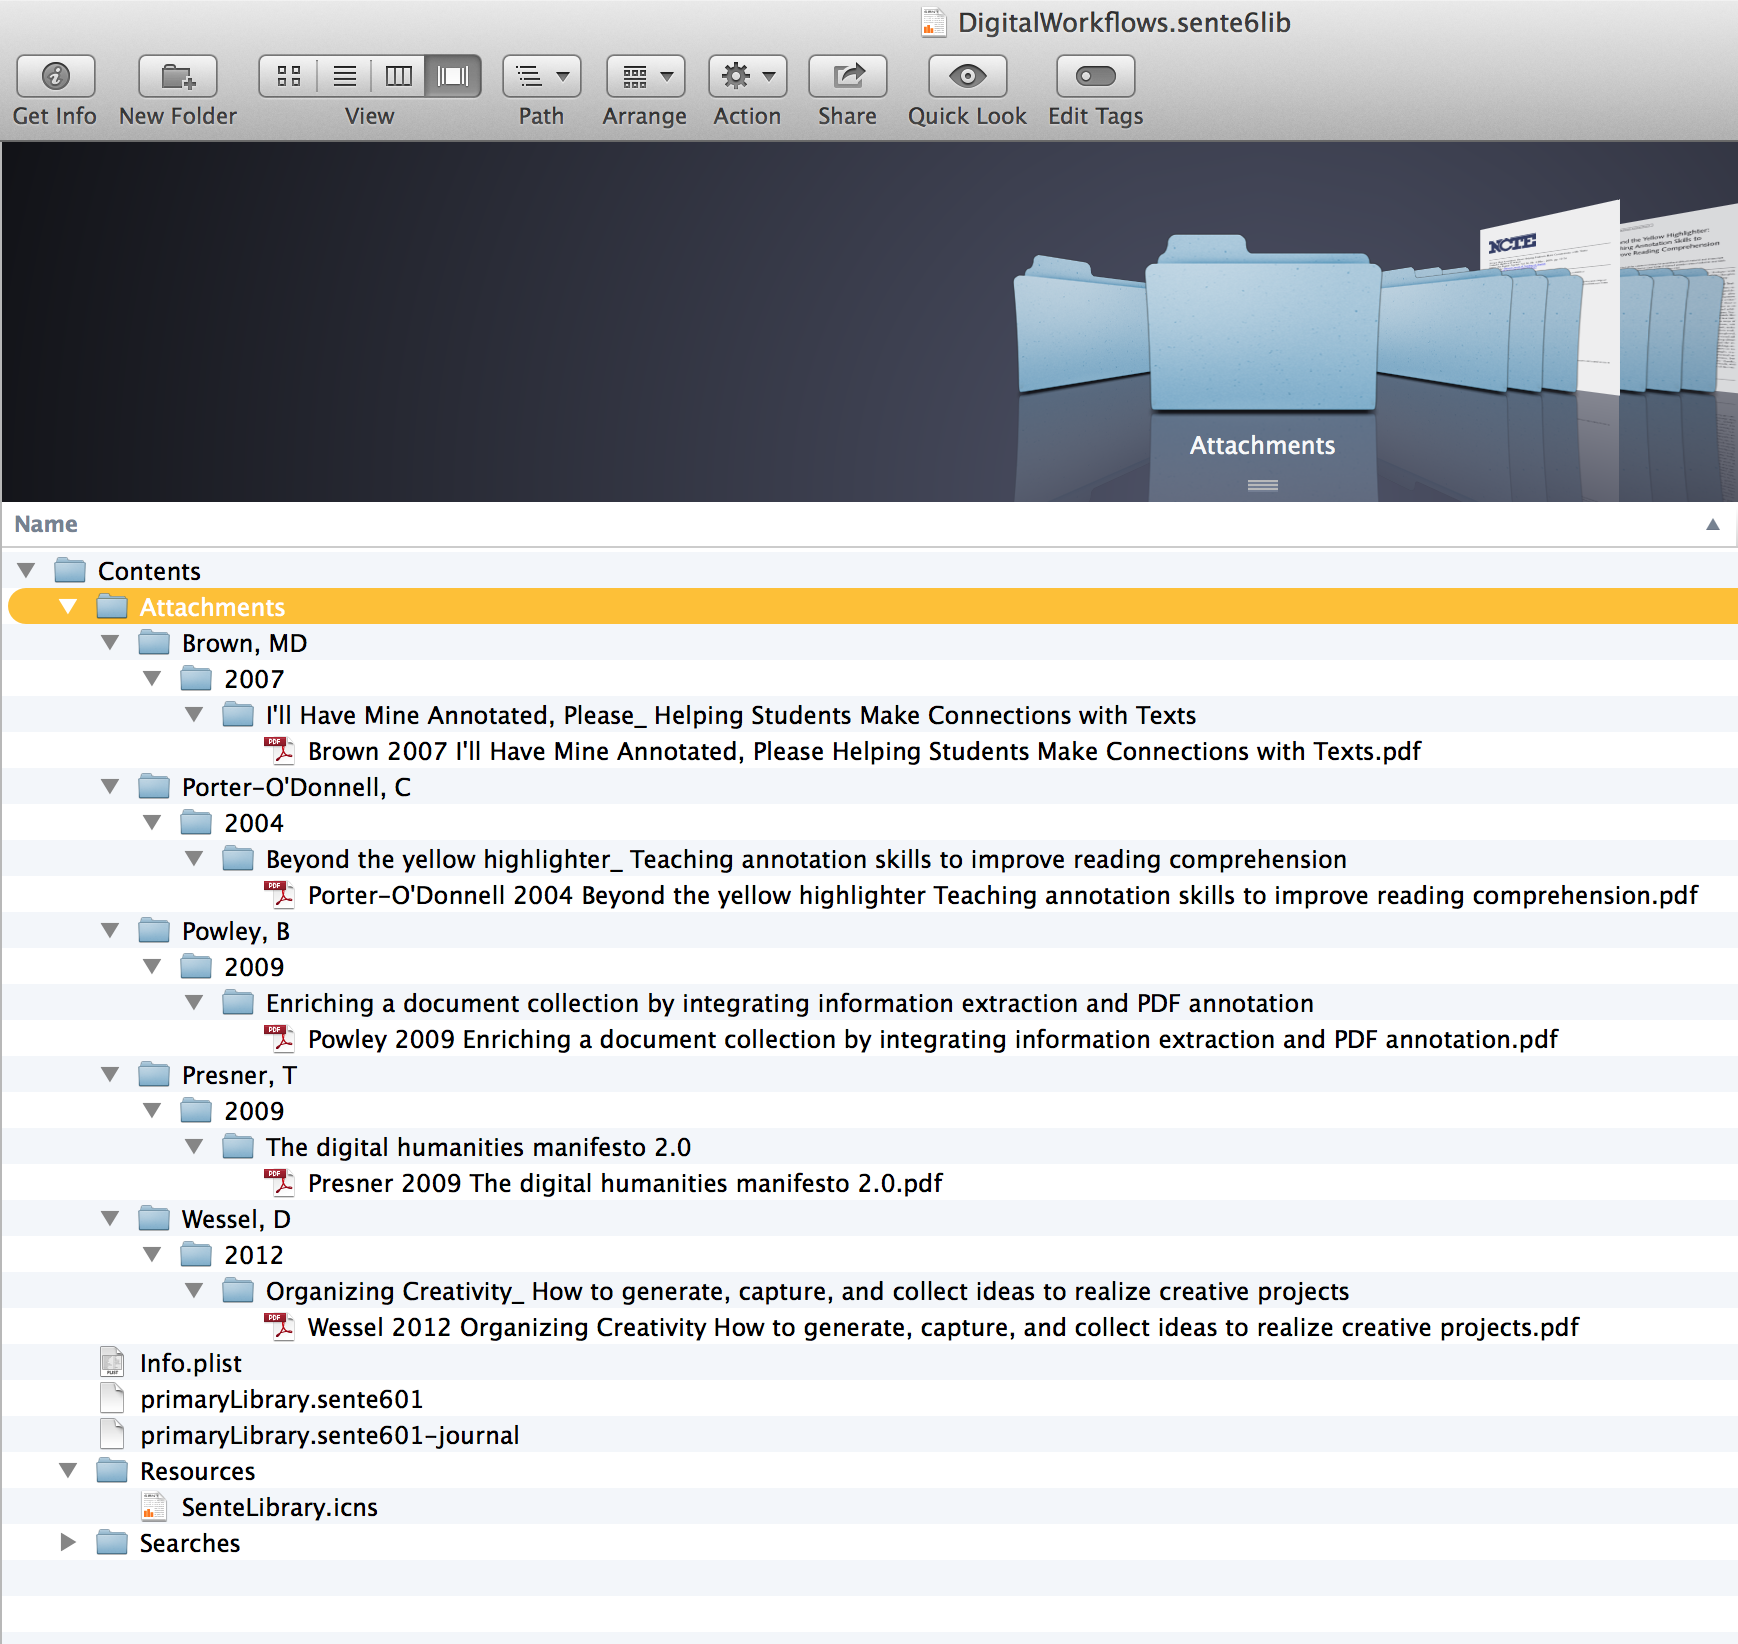
To access the library bundle, navigate to the folder in which you keep the Sente library file (.sente6lib file), and right clicking “show package contents.” Here is what my “DigitalWorkflows.sente6lib” bundle looks lke. What we see is our author date framework, later we will index this structure to our Macintosh finder and spotlight, and DevonThink, but now just note that while Sente gives you a beautiful interface to experience your files and use them, it is also ordering them and keeping them safe as data not proprietarily locked in its system.
So, now that we have our library set up, have made the settings to our liking, and understand the concept behind the library bundle, let’s add our PDFs.
Adding PDFs to Sente Libraries from your PDF inbox
So remembering our messy PDF inbox, let’s one by one add the files. Remember the article I mentioned in the last post? Namely, 724707_1.pdf? 
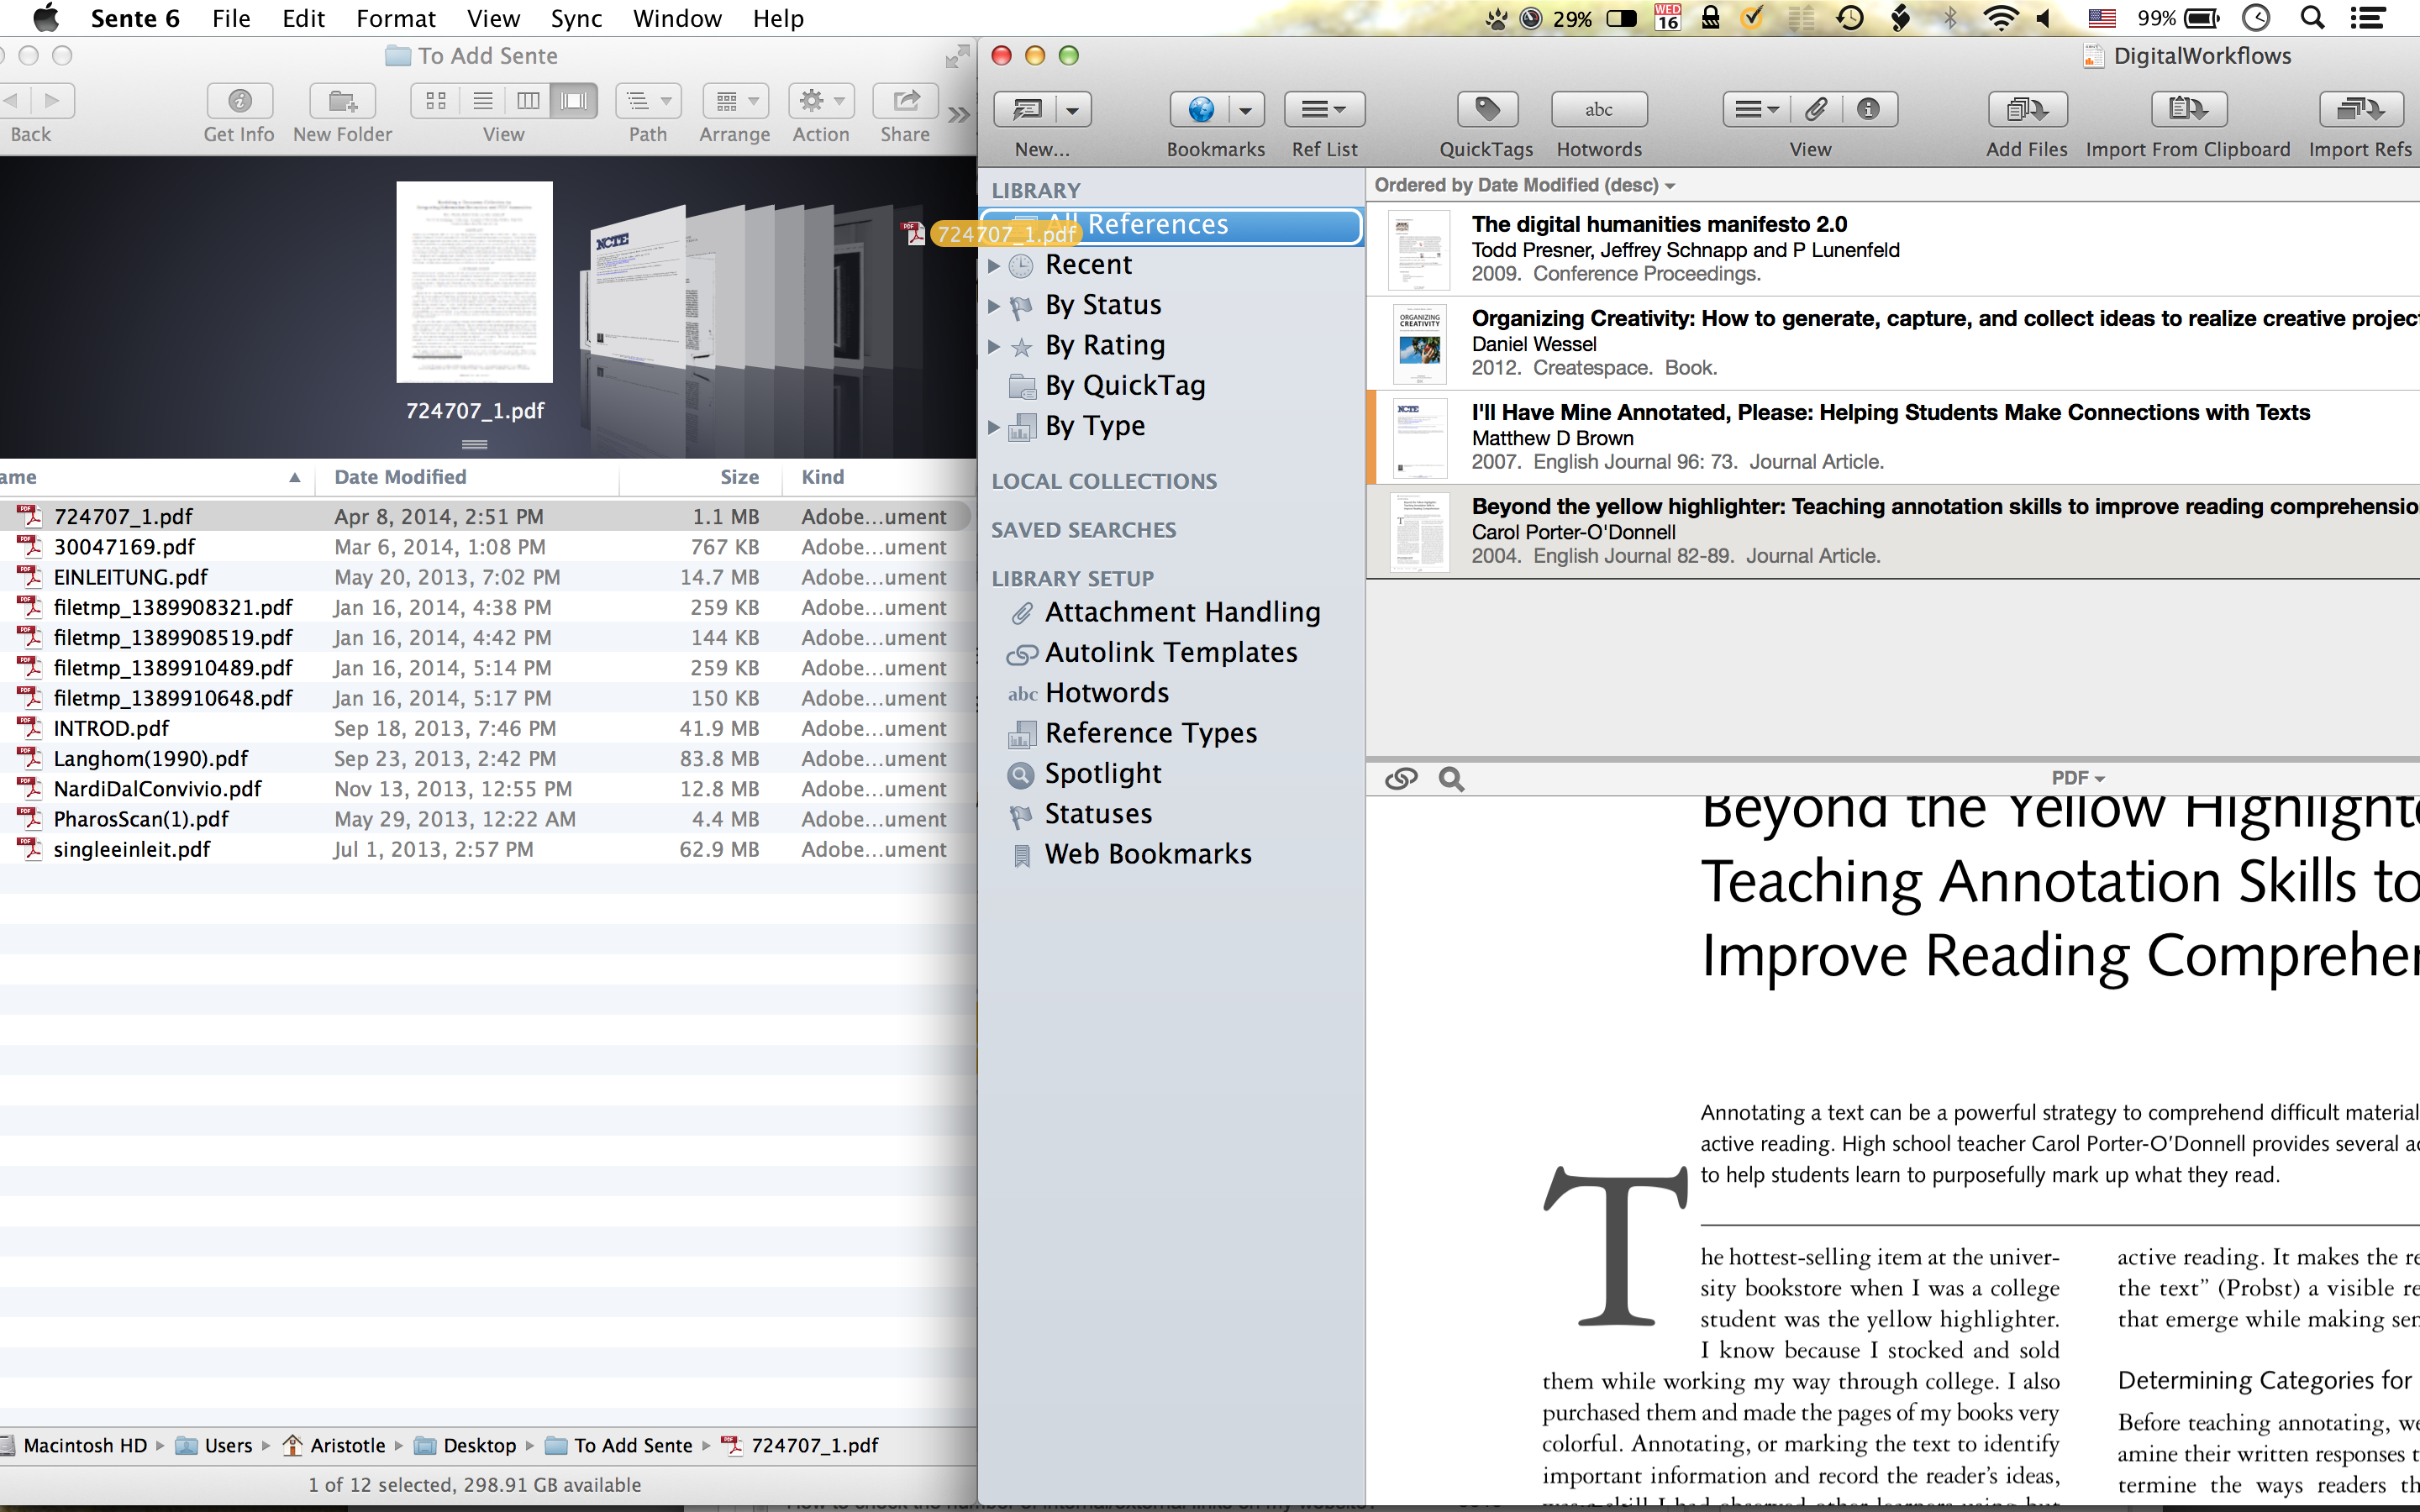
To add this file, simply drag it from the folder into the Library. Sente will then then open up a “citation lookup” box.

Now since we OCRed the PDF before, everything in it is searchable, highlightable. This makes that essential part of the workflow worthwhile. Sente goes the rest of the way: simply highlight the title of the article, and right click (which we Mac users means control click). You now get a choice of citation look up.
Sente gives you two options, one is to automatically search for the selected text on Google Scholar, Google Books, Library of Congress, or WorldCat; the second option will allow you to copy the text and will then automatically open a search box in the selected catalog or database and let you manually paste it to search for it there. I choose Google scholar for now:

Once I highlight the title, control click it, and select “Google Scholar,” Sente now opens its targeted citation lookup mode. Voilà, here’s our reference!

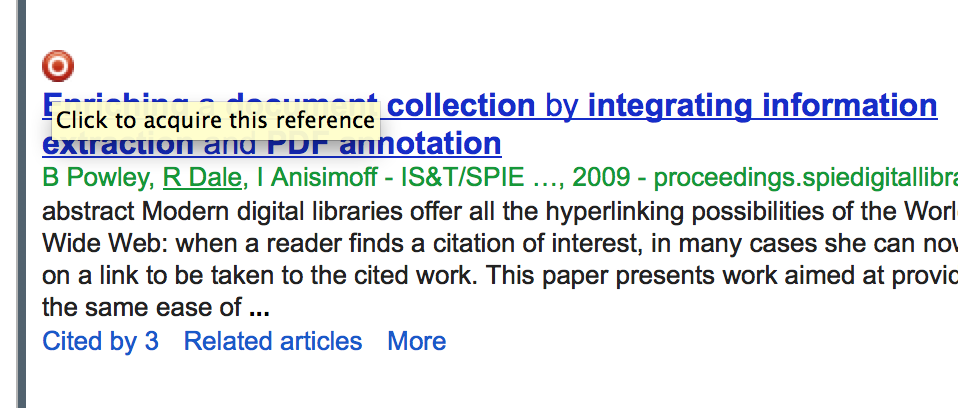 On the right hand side, we see a reference box with targets. Upon clicking the target that matches, Sente pulls up the reference editor, which will allow us to edit the reference before adding it to the Library.
An aside on precise and imprecise metadata
Now, people should understand here that Sente merely gives you access to a wide variety of options for importing “metadata” about your document. I’ve found in my experience that Google metadata tends to be inconsistent and sometimes prone to errors in precision, because it seems that they build the metadata (I assume) often by scanning title and catalog pages, and having an algorithm make somewhat accurate guesses based on large pools of data about which pieces of information, that is–type of publication, author name, editor name, press, etc.– belong to the appropriate fields. Though it is almost always better to select Worldcat (OCLC) or an official academic library catalog for importing metadata, since Google is so pervasive I wanted to show that while it does work, it exemplifies some pitfalls that you should always look out for when adding metadata period.
Thou shalt always make sure your metadata is accurate the first time, and save hours and embarrassment later
Just as I have put so much emphasis on coherent filing, so too, we must put emphasis on precise metadata–not least because with every file you add, correct metadata will ensure you can actually simply just find things in your library. Depending on the database you import your information from, you will sometimes not populate your fields completely accurately. If you do not check to make sure that it looks good the first time, and that the data is correct, you will have to spend hours later correcting it all when you go to make your official bibliography, and use the cite and scan functions. In the worst case scenario, your bibliography will have embarrassing errors later if you have to use it but don’t have time to fix it when you do notice.
In other words, we still will need (and this is often the case, because full automation is somewhat of an absurd idea), to exercise rational intelligence in populating the fields. Sente does populate the fields correctly in so far as the data input to begin with in the originating database is correct.
As a general rule, Worldcat and academic libraries, like Stanford and University of Wisconsin work quite well within Sente. You can also target from Columbia’s CLIO, which I’ll show in a later post. The point is that since you want to treat this like your real, legitimate library–because it is as real and legitimate as a paper library–you want the information to match up as much as possible the first time.
Checking your entry
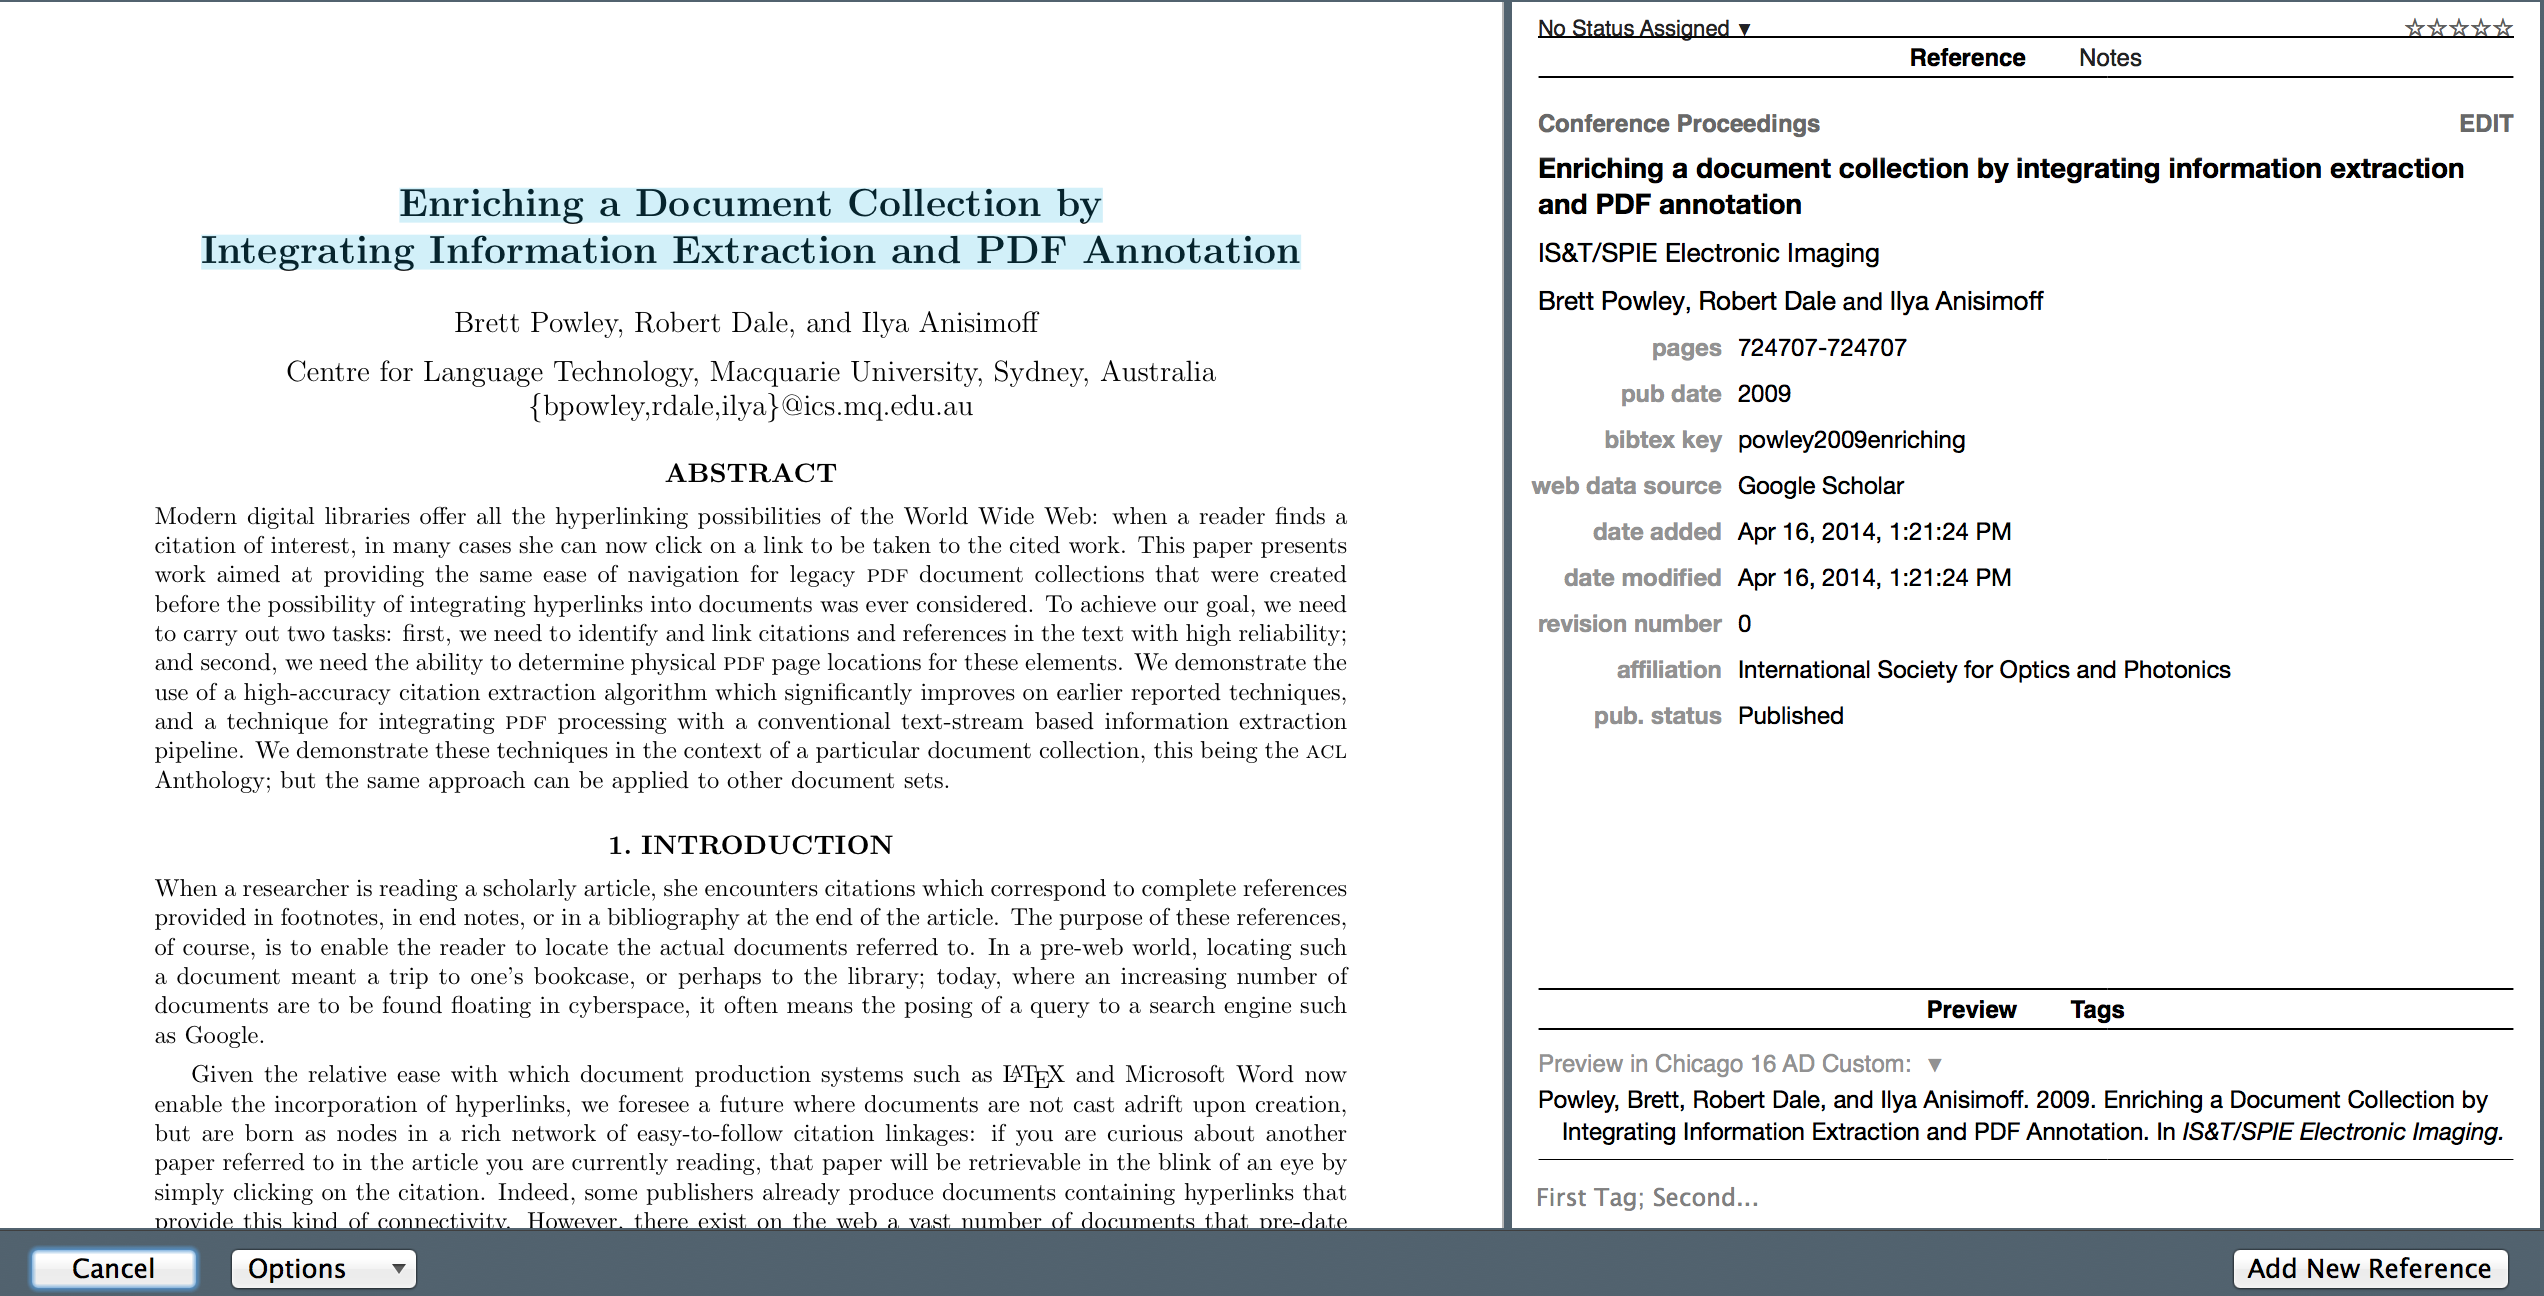
 Look at this example, does anything look off? First of all, in the original import of metadata, it says “conference proceedings.” In many ways, conference proceedings will function like journal articles, but I prefer in this case, based on the information available to me, to classify this as a journal article. Always check and make sure it’s the correct sort of publication, sometimes it is not, or will require you to decide long term if you care about making the difference between the books and conference proceedings category, or the difference between certain proceedings and stand-alone articles which proceed from said conference proceedings. My advice is merely to be consistent. Moreover, note that Google scholar has populated “7247, 724707” in the pages field. This is clearly not the pages, but is the volume data information for this database publication! (If you click “add new reference” in a hurry, you just added something you’ll need to correct later, or will inconveniently discover as an error). We now discover the origins and rationale of 724707_1.pdf as a file name.
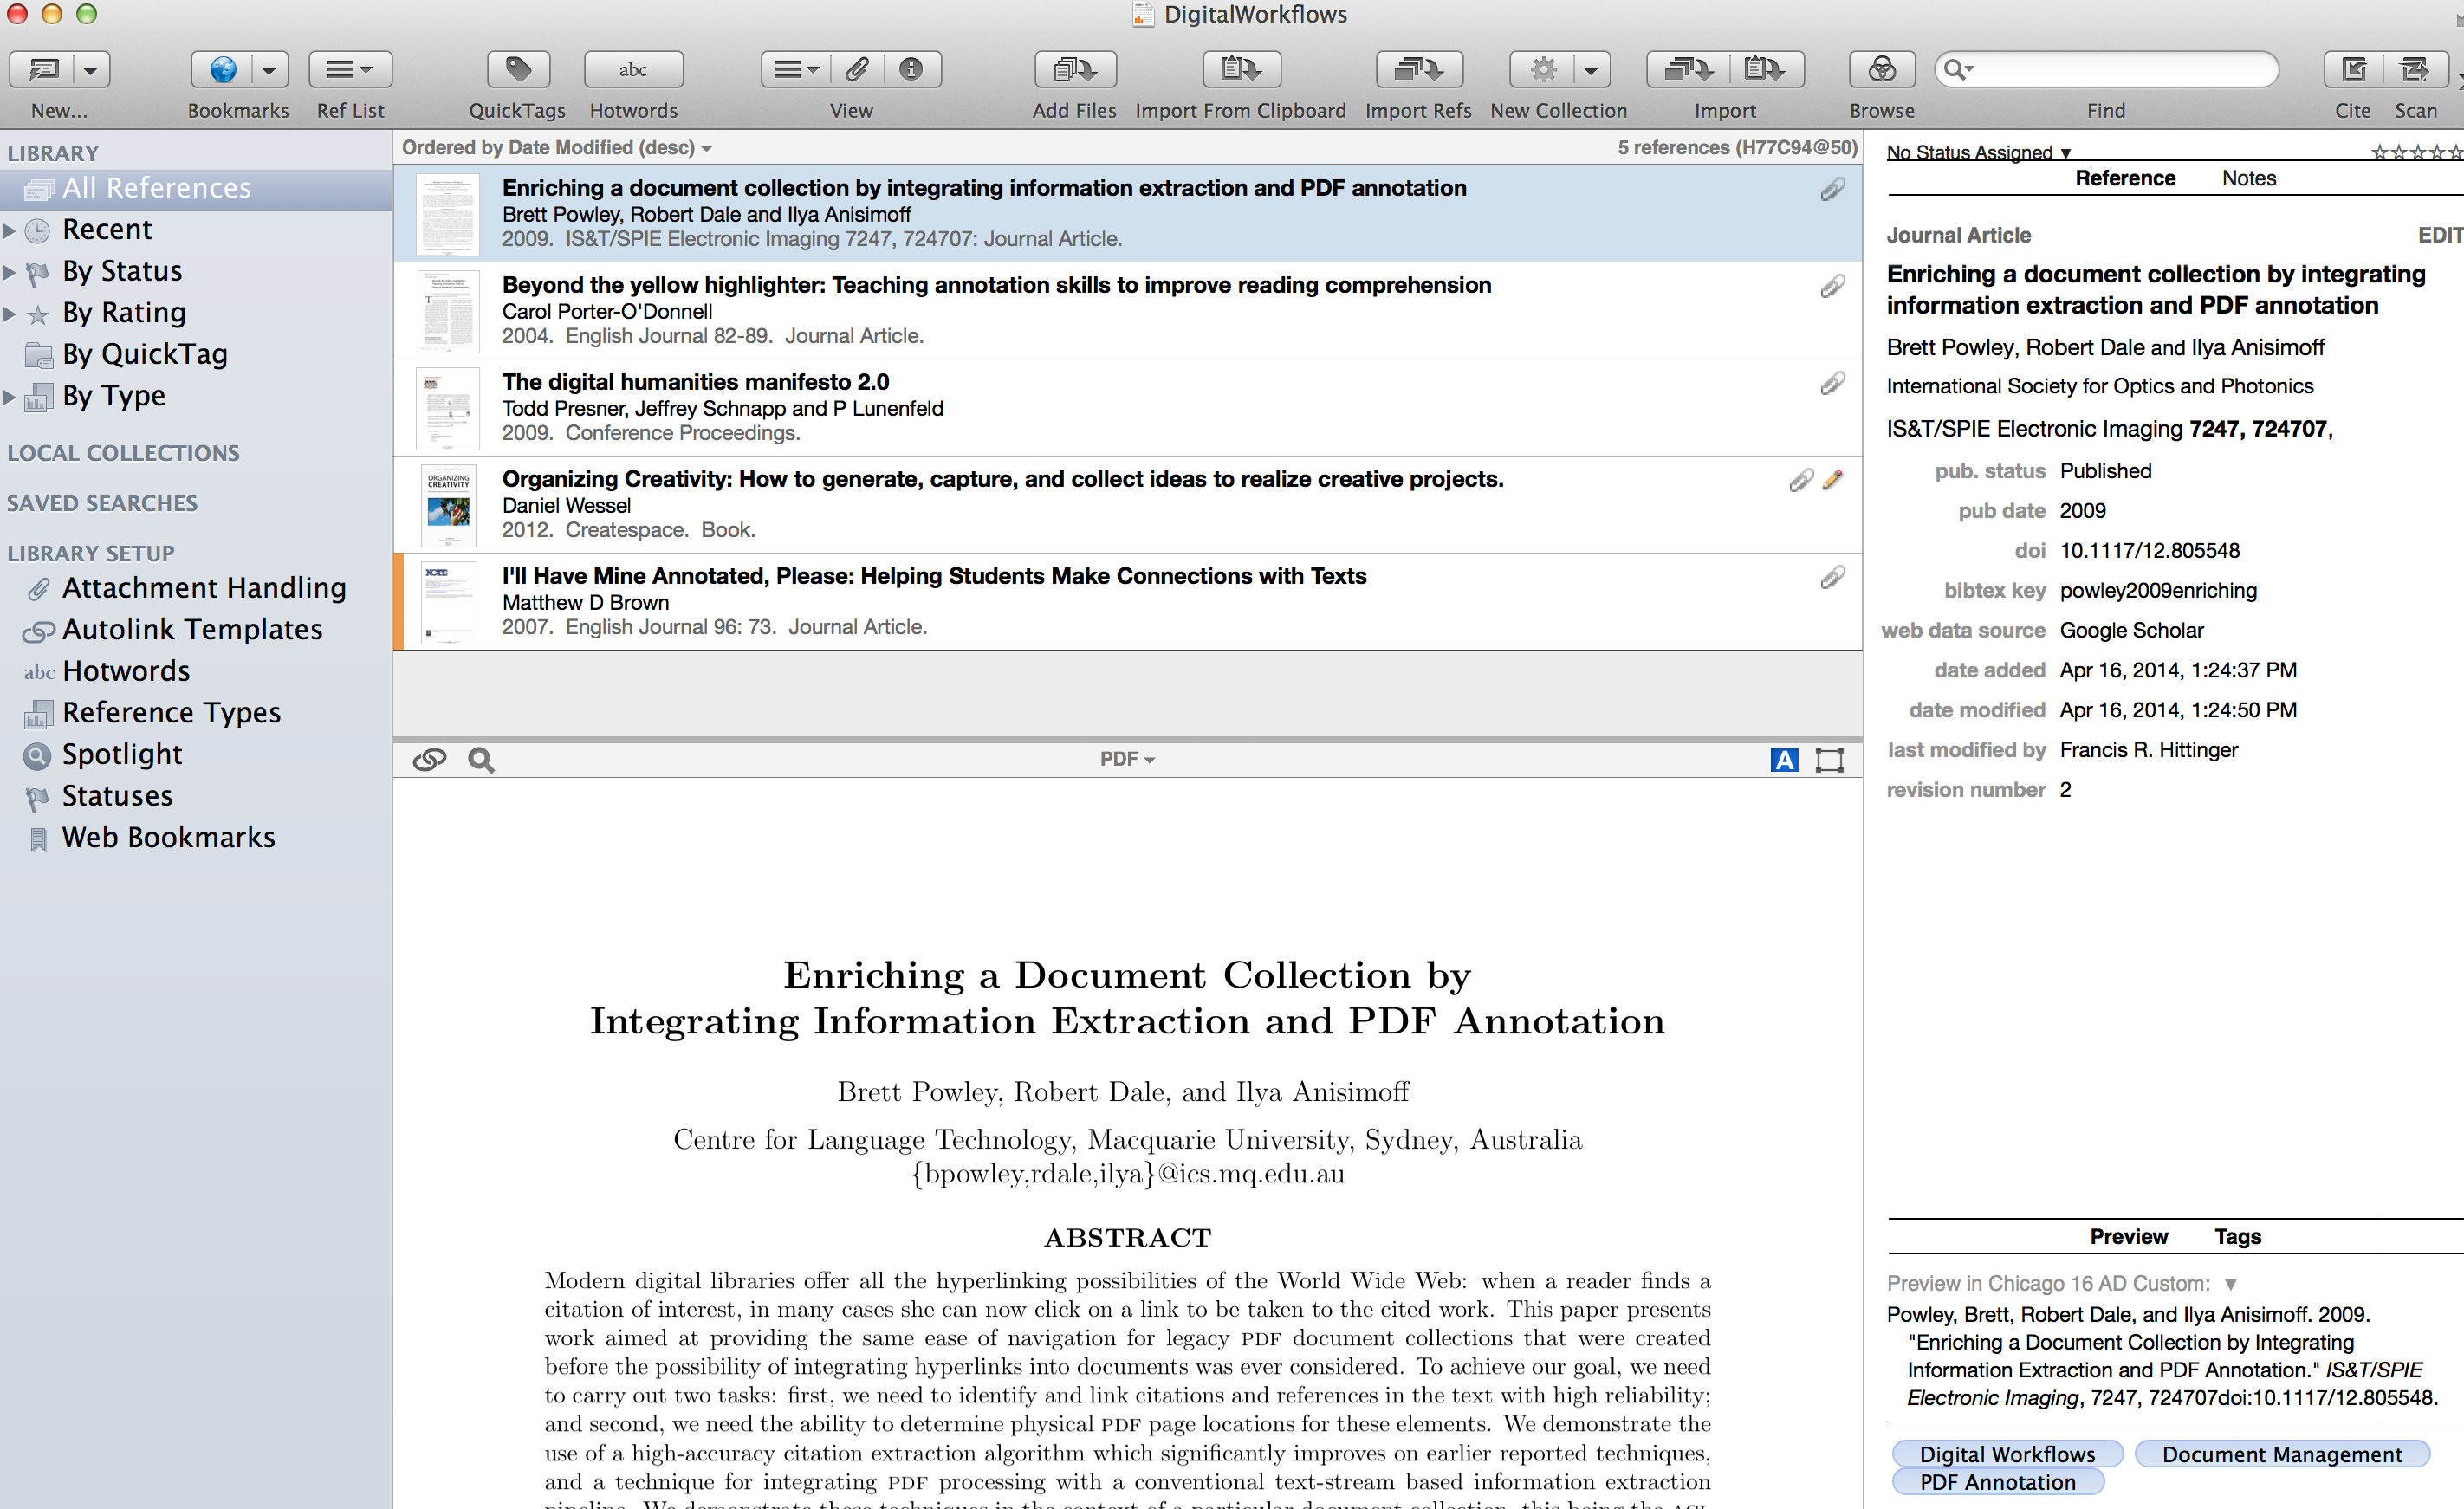
Here I not only correct the data, but take the opportunity to add the DOI (digital object identifier), and also check to make sure there is nothing out of place. If the item is an edited volume with one or more editors qua authors (i.e. the volume’s editor is the primary citable contributor) , you can change the names to “editor” by clicking the drop down box, and then click the editor category, selecting “make editor primary contributor role.”
In the “preview” window, which I have set up to preview the citation according to my custom Chicago 16 Author Date bibliographic format rules–a slightly modified Chicago 15 AD–we see what the citation would look like in a bibliography. Once I fix things and click the edit button again, the updated citation will appear in the preview. Everything seems in place. Once we click “add reference,” we now see our document added to our library, and the PDF is readable in the reading window. If you use Sente on a synchronized iPad, this will automatically synchronize.
Stay tuned on the next post on Sente, and in the meantime get started with your new library!
Looking forward to subsequent posts on integrating Sente and Devonthink. I’ve been using a script to pull notes and attachments from Sente to Devonthink, but ever since the most recent Sente update it no longer pulls over attachments, so I’m interested to see if you’ve found anything that will work.
Thanks, Sarah, for pointing this out. I posted on the sente.tenderapp.com discussions in response. It seems that it’s not the newest build of Sente, but rather the newest version of DevonThink after version 2.7.3 (I think). I’ve asked Houthakker to look into it, since it’s his script, and hopefully we will get this resolved.